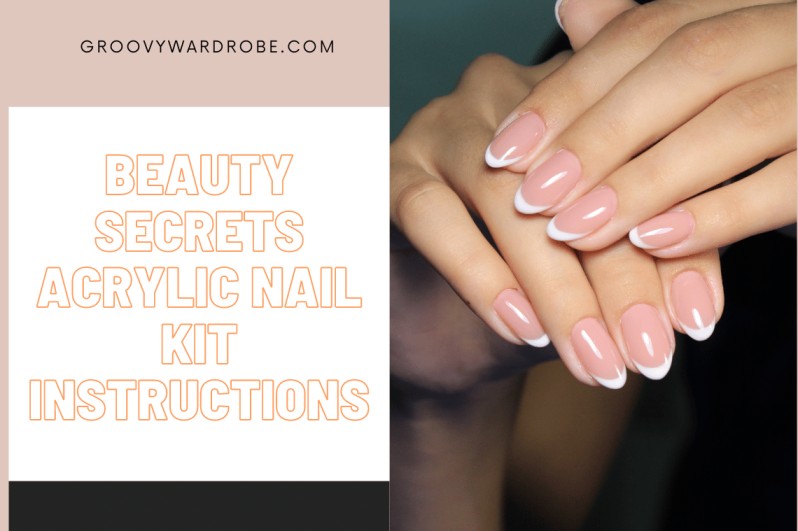
Gray hair indicates a person's level of maturity, but nothing reveals age like untidy hands and fingernails. A gorgeous set of nails boosts not only self-esteem, but also a professional, well-groomed, and young appearance. One method for achieving picture-perfect nails is to use sculptured nail enhancements like those found in the beauty secrets acrylic nail kit instructions. Allow 45-60 minutes to apply a full set of sculptured nails.
Your Complete Guide to At-Home Acrylic Nails
Interested in trying acrylic nails but unsure where to begin? You have arrived to the correct location. This article will lead you through the full process of applying acrylic nails, from start to finish. Acrylics are an excellent method to build confidence, express yourself, and experiment with your appearance.
To begin using a new beauty product, it's important to familiarize yourself with its ingredients, variants, and proper application methods. Acrylic nails are no exception to the rule. When you decide to become your own nail technician and do at-home acrylic treatments, you are effectively learning a new art form. This tutorial will teach you all you need to know to successfully apply acrylic nails at home.
What Is An Beauty Secrets Acrylic Nail Kit Instructions
Acrylic Nail Kit: Includes 3pcs acrylic nail powder, 12pcs glitter powder, acrylic nail brush, fake nail tips, USB LED Nail Lamps, USB Mini Nail Milling Machine, and more nail tools.
Professional acrylic nail kit with everything you need when you make acrylic nails.
Recommended to read:
Why Use The Beauty Secrets Acrylic Nail Kit

Acrylics stand out from other choices such as gel and dip nails due to their long-lasting nature and the numerous customizing possibilities available. Acrylics may be applied at home, making for a pleasant and creative hobby that boosts confidence significantly. Furthermore, the toughness of the substance used to make acrylic nails frequently makes them last longer than dipped or gel alternatives. Acrylic nails are a terrific method to personalize your nails and maintain their appearance for weeks.
How to Get Started with Acrylic Nails
Before applying artificial nails, make sure your natural nails are clipped. When trimming your nails, symmetry is more crucial than ever. Make careful to trim each nail to the same length. Remember that the nail tips will make your nails appear longer, so you won't have to worry about clipping your natural nails too short.
After you've clipped your nails, clean them up with a file or buffer. You'll be using glue to attach the tips to each nail, and it works best if your nails are filed or polished. If your nails are overly wet, smooth, or greasy, the glue will not adhere as well. Filing or buffing, along with a good priming (more on that in a minute), will guarantee your acrylic tips are easy to apply and stick nicely.
After you've filed or buffed your nails, inspect your cuticles. The cuticle is an outgrowth of skin that extends over the surface of your fingernail. Before applying acrylic, make sure your cuticles are pushed back. Pushing back your cuticles allows room for the acrylic and tip, which will blend in smoothly with your natural nails. Your objective is to apply the acrylic directly past your cuticles rather than on top of them. The cuticles should be carefully pushed back far enough to let the acrylic to achieve the desired appearance.
Finally, apply dehydrator and primer. The dehydrator will remove any extra moisture or oil from your fingernails, while the bonder will assist the acrylic cling to your nails. This wetness is generally beneficial to your skin, but it is ineffective when trying to apply acrylic cosmetics. The proper use of primer/bonder will give your nails a matte appearance and remove the shine they naturally have. Before applying tips, you must first apply primer and file or buff your nails.
What Are The Components Of The Beauty Secrets Acrylic Nail Kit
Acrylic powder is devoid of bubbles, which helps to strengthen and clarify. Acrylic liquid includes optical enhancers, which assist prevent yellowing. The set includes 40 nail tips, 30 nail forms, mini nail file, glass dish, and small Acrylic nails brush.
Are You Preparing Your Natural Nails For Acrylic Application
Be delicate and avoid using excessive pressure. By the completion of this process, the nail should have no shine. After polishing your nails, remove any nail dust. Lingering dust and dirt make for an untidy surface and can cause bubbling or lifting of the acrylic.
How Do You Shape And File Acrylic Nails To Get A Beautiful Finish
After the acrylic has cured, shape the tips with a coarse nail file (180 grit) to the desired length. Use a buffer to buff the surface of the nails; the 240 grit file removes scratches from the 180 grit file. Finish with 1000 grit, then 4000 grit for added gloss.
Read also: HOW TO SOOTHE SUNBURN DISCOMFORT: THE HOTTEST TIPS FOR COOLING DOWN
Using The Acrylic Mixture
For the following stage, you'll need a decent brush. Mix the liquid monomer and acrylic polymer with a brush to create a mixture for applying to each nail. A high-quality brush will allow you to distribute the acrylic mixture simply and evenly. When using the brush, aim to make smooth strokes in the same direction on your nails. If you use side-to-side or up-and-down strokes, the acrylic mixture may be irregularly distributed or clumped. Nice, gentle brushstrokes from the base of each nail to the tip are the way to go.
To prepare the acrylic combination, place the liquid in one dish and the powder in another. You will combine powder and liquid to make a mixture that is easy to distribute and holds its form nicely. Because of its stickiness, this acrylic combination will cling to the tip of your brush, so distribute it in little amounts at a time.
Keep the powder and liquid separate throughout the application procedure, only combining them when you're ready to apply the mixture to your nails. Between brushstrokes, clean your brush to make mixing simpler.
Acrylic Powder
Acrylic nail products are available in clear or colorful options, with the principal ingredient making them stand out. Allow yourself to be as creative as possible throughout this stage of the procedure. The way you show off your individuality with your nails is totally up to you, and there are several possibilities. You may even combine colors to make stunning patterns. Your nails are your canvas; you can do whatever you want with them.
If you choose a solid color acrylic, you may explore by painting your nails in different colors or switching colors on each nail. Combining colors turns acrylics into an adventure and provides for an excellent at-home art project that you can proudly wear. You may create an artistic gradient by combining darker, moodier colors, an eye-catching striped pattern with brighter hues, or anything in between.
When it comes to creating unique designs on your acrylic nails, employing brushes of various sizes is essential. You may begin a design with a solid color basis or combine colors to create a gradient. A larger brush may be used to create the basis of your paint job, but once you start working on details, you'll need a finer one.
Caring For Your Acrylic Nails To Ensure Longevity
- Treat your acrylics gently.
- Keep them dry.
- Do not use acetone.
- Keep the skin around your nail healthy.
- Follow a good personal hygiene.
- Avoid DIY in case of any damage.
Removing Acrylic Nails Safely And Properly
- Step 1: Clip. Start by using a nails clipper to cut excess length from your acrylics.
- Step 2: Prep.
- Step 3: Wrap and soak.
- Step 4: Wait.
- Step 5: Flake away (or soak again)
- Step 1: Clip.
- Step 2: Tweeze.
- Step 3: Soak.
Conclusion
beauty secrets acrylic nail kit instructions are an art form, a means of personal expression, and an excellent method to improve your appearance and confidence. Putting them on yourself requires some patience and work, but it's a fun and useful skill to acquire. Upon completion, you will have a wearable work of art to be proud of and enjoy for several weeks.
FAQ's
How do you use an acrylic nail kit at home?
- Prep Nails. Items You Will Need. Nail file. ...
- Choose the Right Size. Items You Will Need. Acrylic nail kit. ...
- Apply with Acrylic Glue. Items You Will Need. ...
- Apply Pressure to Each Nail.
- File and Clip Nails as Needed.
- Apply Coat of Acrylic Color.
- Dry for About 10 Minutes.
How long do acrylic nails last?
According to Cosmopolitan, a full set of acrylic false nails may endure for six to eight weeks. However, you should see your favorite nail technician every 2 to 3 weeks to fill in the gaps caused by the development of your natural nails.
What are the basics of acrylic nails?
Acrylics are created with a liquid monomer and don't require resin. Both nail enhancements can be used to lengthen your nails, but dip powder requires tips to do so, while acrylics can provide length with tips or by being sculpted on top of nail forms.
Read also: HOW TO HYDRATE SKIN: A COMPLETE GUIDE